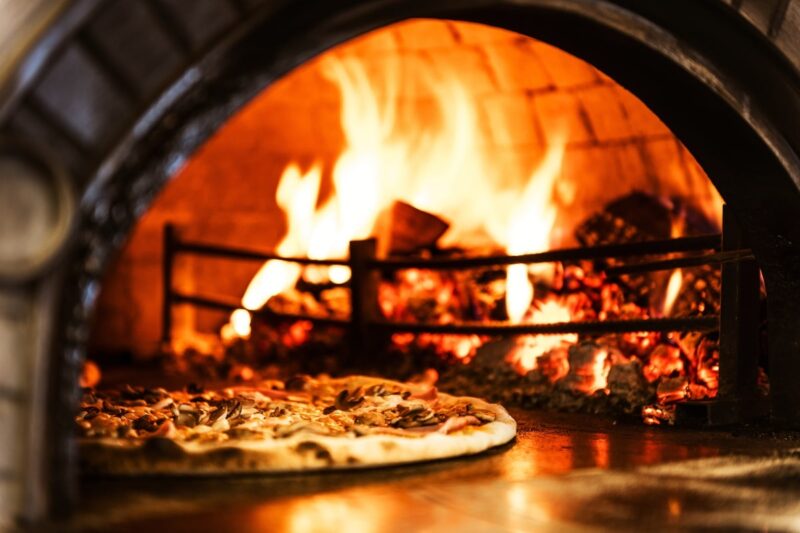
Wood-fired pizza ovens have been the heart of many Italian kitchens for centuries. Their ability to reach high temperatures and impart a unique smoky flavor to pizzas and other baked goods is unparalleled.
If you’ve ever tasted a pizza from a wood-fired oven, you’ll know the difference. But did you know that building one in your backyard isn’t as complicated as it might seem?
Here’s a step-by-step guide to help you create your very own wood-fired pizza oven.
1. Choose the Right Location
The location of your wood-fired pizza oven is paramount. It determines not only the efficiency of your cooking but also the safety of the surrounding environment.
Key Considerations
- Safety First: Ensure the chosen spot is away from flammable materials such as children’s toys, plants, and washing lines.
- Accessibility: The location should be easily accessible for bringing in construction materials and later, for pizza parties.
- Ventilation: Ensure there’s ample ventilation for your pizza oven to prevent smoke inhalation for anyone nearby. Avoid placing it under a gazebo or any covering. Let the smoke disperse freely.
- Distance from Home: The oven should be no closer than 10 feet from the entrance to your home, with its entrance facing away from your home. This ensures that any smoke or heat doesn’t affect your living spaces.
2. Lay the Foundation
A robust foundation ensures that your oven remains stable and durable for years to come. It provides a level base, ensuring even heat distribution and efficient cooking.
Steps to Lay the Foundation
- Digging: Start by excavating a shallow pit, about 6 inches deep. This depth is ideal for insulation and stability.
- Drainage Layer: Fill the pit with a layer of gravel. Gravel ensures proper drainage, preventing any water accumulation which can damage the oven’s base.
- Leveling Layer: Top the gravel with a layer of sand. Sand provides a smooth and level surface for the next stages of construction.
3. Build the Base
The base of the oven serves multiple purposes. It elevates the oven, making it easier to access. It also acts as an insulating layer, retaining heat and ensuring efficient cooking.
Constructing the Base
- Material Selection: Cinder blocks or bricks are ideal for constructing the base. They are sturdy, heat-resistant, and provide excellent insulation.
- Arrangement: Lay the cinder blocks or bricks in a rectangular or square shape, depending on your oven’s design. Ensure they are closely packed and level.
- Insulation: Once your base structure is ready, you can add an additional layer of insulating material, like vermiculite or perlite, to enhance heat retention.
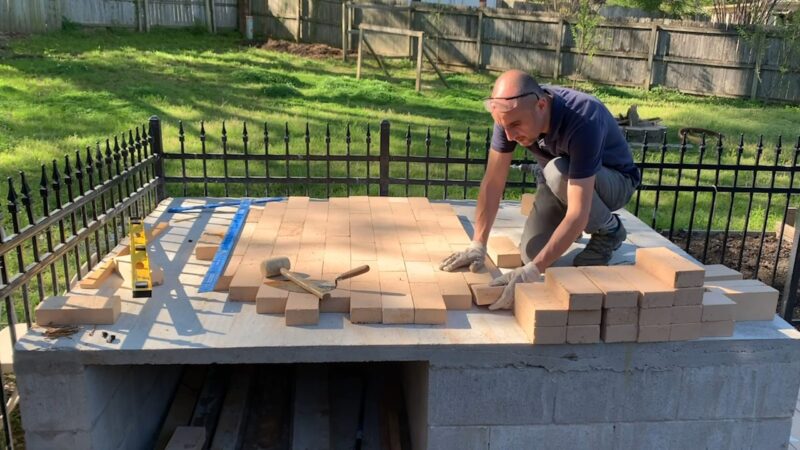
4. Construct the Floor
The oven floor plays a crucial role in the cooking process. It directly impacts heat distribution and retention, ensuring that your pizza or any other dish gets cooked evenly.
Constructing the Floor
- Material Selection: Firebricks are the preferred choice for the oven floor. They are designed to withstand high temperatures and have excellent heat retention properties.
- Laying the Bricks: Place the firebricks on the base you’ve built. Ensure they fit snugly against each other to prevent heat loss.
- Leveling: Use sand to level the bricks as you lay them. This ensures a smooth surface for cooking and even heat distribution.
5. Mold the Dome
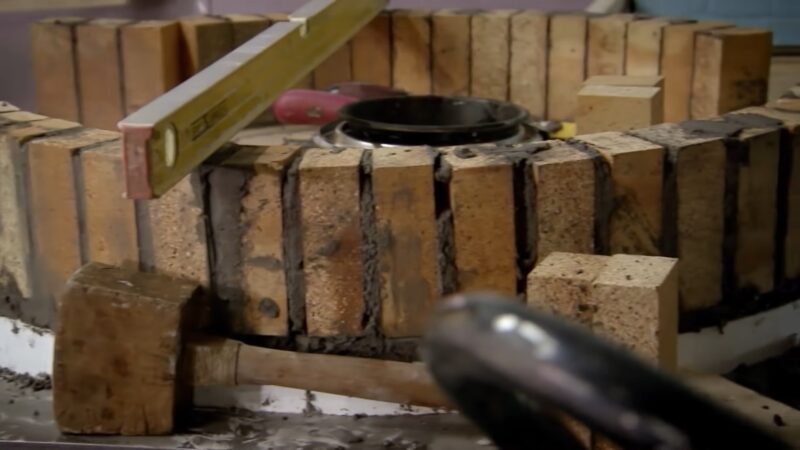
The dome is the heart of the pizza oven. It determines the oven’s heat dynamics and is responsible for the unique cooking environment that a wood-fired oven offers.
Steps to Mold the Dome
- Sand Selection: Opt for wet sand, which will hold its shape better and provide a clear mold for your oven’s structure.
- Shaping the Dome: Pile the wet sand on the oven floor, shaping it into a dome. The height of this dome should be equal to the radius of your floor, ensuring optimal heat circulation.
- Support Structure: If you’re using bricks for the dome, consider creating a wooden frame to support the dome during construction.
6. Apply the Clay
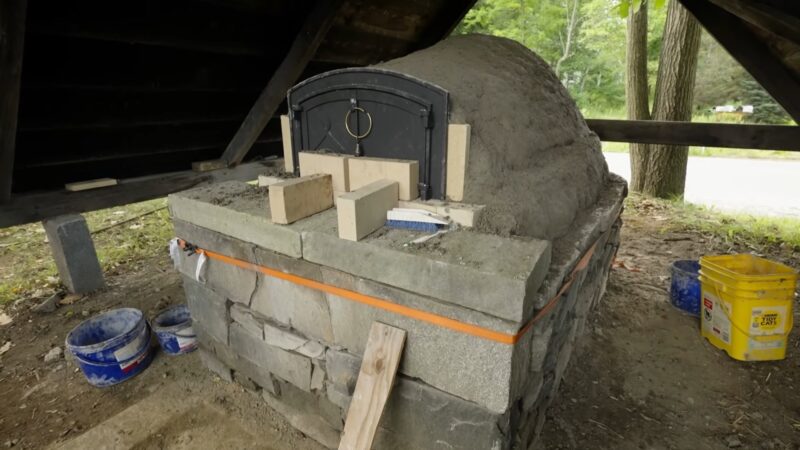
Clay acts as an insulator, retaining heat inside the oven. It also provides the oven with its characteristic rustic appearance.
Applying Clay
- Preparing the Clay Mixture: Mix clay with water until you achieve a thick, pliable consistency. The consistency should be such that it can be molded but holds its shape.
- Application: Apply this clay mixture over the sand dome. Ensure you maintain an even thickness throughout to ensure uniform insulation.
- Smoothing: Once applied, smooth out the clay, removing any air bubbles or inconsistencies. This not only enhances the oven’s appearance but also ensures better heat retention.
7. Cut the Entrance
The entrance of your oven is not just a gateway for your delicious pizzas but also plays a crucial role in airflow and heat management.
Steps to Cut the Entrance
- Timing: It’s essential to cut the entrance when the clay is set but not completely dry. This ensures a clean cut without causing cracks.
- Marking: Roughly mark the width and curve of your entrance. The width should be based on the size of a standard pizza peel or roasting tray.
- Cutting: Using a carving knife, slowly cut out the marked area. The clay will likely come away in large chunks, revealing the sand mold inside.
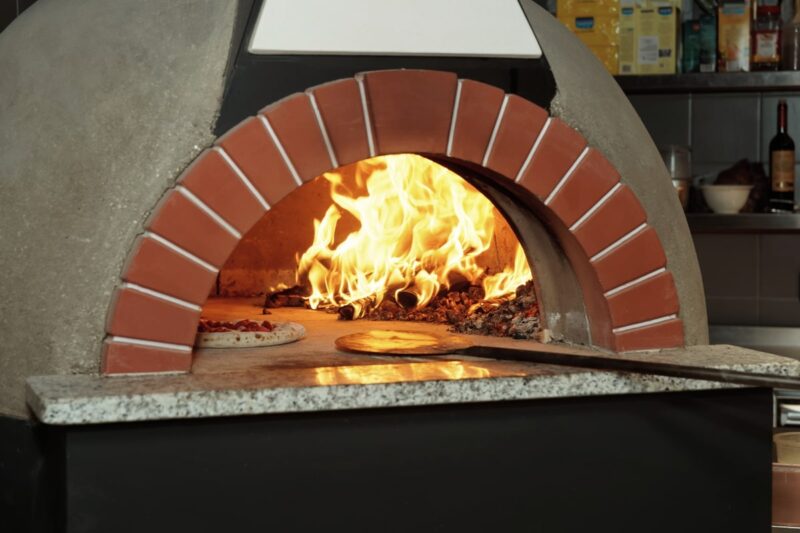
8. Construct the Chimney
The chimney is essential for drawing out the smoke from the oven, ensuring a clear view of the inside, and preventing smoke from billowing out of the entrance.
Steps to Construct the Chimney
- Positioning: The chimney should be located just behind the brick arch entrance.
- Cutting the Hole: Sketch a rough circle on the top of your oven where the chimney will be placed. Drill holes around the circumference for easier removal of the now semi-set clay.
- Building the Chimney: Build up a small chimney around the hole using more clay-sand mixture. This chimney should be about 20cm high for optimal smoke extraction.
- Sealing: Ensure there are no gaps between the brick arch, the oven entrance, and the chimney. Use the remaining clay-sand mixture to seal any openings.
9. Final Drying
Drying ensures the stability and durability of your oven. It also prepares the oven for its first firing.
Drying
- Natural Drying: Allow the oven to dry naturally. This might take several days, depending on the weather conditions.
- Sand Removal: Once it is dry, gently excavate the sand from within the layer. This reveals the inner surface of your oven.
10. Fire It Up!
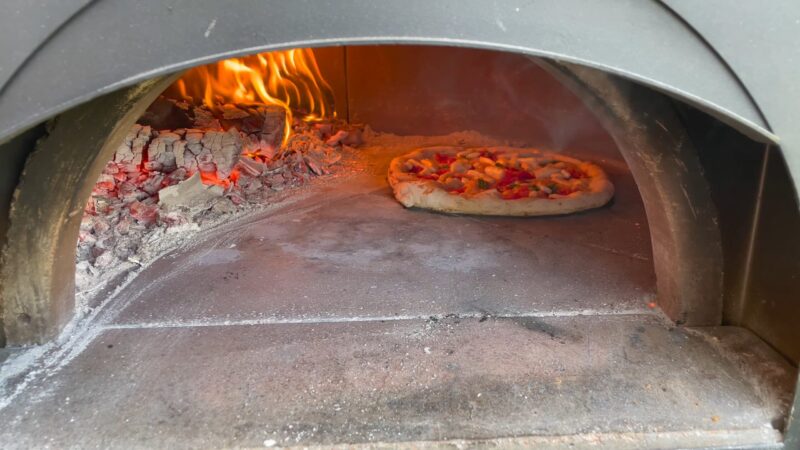
Curing the oven is essential to strengthen its structure and prepare it for regular cooking.
Curing
- Kindling: Prepare some small “pencils” of kindling and set them up inside but near the entrance of your oven.
- Starting the Fire: Light the kindling and slowly add more wood. As the fire grows, push it back into the oven, ensuring it eventually burns in the center-back part of the oven.
- Monitoring: Watch the fire closely. If it seems to be going out, add some crumpled newspaper to rekindle the blaze. Use smaller pieces of wood as they burn more efficiently.
- Adjusting the Entrance: If smoke seems to be pooling inside the oven, you might need to adjust the height of the entrance to allow for better smoke escape.
FAQ
Can I cook other foods in a wood-fired pizza oven?
Yes, a wood-fired oven isn’t just for pizzas. You can also try cooking whole roasted chicken, suckling pig, or baked root vegetables with a subtle smoky flavor.
How long does it take for the oven to be ready for use?
After constructing the oven, it’s essential to let it dry out for between 5-7 days. Once dried, cure the interior by lighting a fire inside, as you would when preparing to cook a pizza, and let it burn for several hours.
Allow it to cool off completely before using it for the first time.
What are the benefits of a wood-fired pizza oven?
Apart from the authentic taste it offers, a wood-fired oven also acts as a beautiful addition to your backyard, giving it a Mediterranean-style decor. It’s a conversation starter and can be the centerpiece of many memorable gatherings with friends and family.
How do I maintain the entrance of the oven?
The entrance of the oven, or the aperture, should be carefully designed to retain heat. If it’s too large, you risk losing a lot of heat during the cooking process. After cutting the entrance, use a trammel and wooden supports to build a brick archway above the mouth of the oven.
This not only adds to the aesthetic but also helps in heat retention.
Last Words
Building a wood-fired pizza oven is not just about having a tool to cook pizzas. It’s about the experience, the taste, and the joy of creating something with your own hands.
While the steps above provide a basic guide, remember that every oven is unique. Feel free to customize yours to fit your needs and preferences.
And once it’s built, gather your friends and family, and enjoy the unbeatable taste of wood-fired pizzas!